{Between The Braces}

Code, code, and more code

Nuking a Hard Drive

I recently had to wipe three old laptops before disposing them and since it took forever to find the best way to do it, I decided to blog it in case I ever need this again.

I used DBAN (Darik’s Boot and Nuke) which was simple and effective. You burn it to a CD (as a disc image), pop it in the drive, reboot, and follow the prompts. Easy as nuking pie.

To burn an ISO in Windows 7, right click on the disc image and choose Burn disc image.

You will most likely have to set your computer to boot from a CD. On my old machines, I had to hold down F2 as they were booting to bring up the BIOS where I could make the change.
Installing an ISO using Virtual Clone Drive

This process will work to install any software that is stored as a disc image (or ISO) file.

1. Install SlySoft Virtual Clone Drive (freeware).

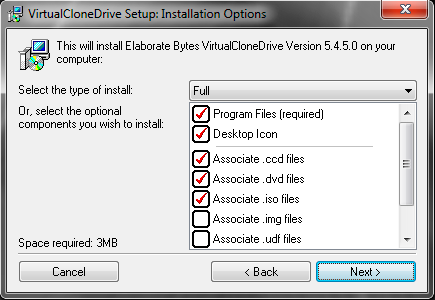
2. During the install process it will ask to associate ISO files with Clone Drive

Associating ISO files with Clone Drive

3. Once the software has installed go and find the ISO file you wish to install.  It should now be associated with Virtual Clone Drive.  Double clicking the ISO file should bring up the files installer.

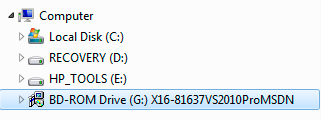
4.  If that fails to work, right-click on the ISO file and choose Mount.  After a moment, you will have a new drive letter listed under Computer in Windows Explorer.

Sample mounted drive using Virtual Clone Drive

5. Select the drive and then look for the installer file (usually setup.exe).

6. When finished installing find the ISO file, right-click it and choose Unmount.

Quick Tip: Fade Text Away Horizontally

To quickly create a faded text effect the best approach is to use a layer style.  Create a new Photoshop file (950 px * 200 px) and add some text (I used Rockwell at 150pt).

In the layers panel (with the text layer created above selected), click the Add a layer style (fx) button and select Gradient Overlay.

The Gradient Overlay panel of the Layer Style window will now be visible.  By default, the gradient is a top-down gradient (i.e. vertical).  However that can be easily changed to a left-right (i.e. horizontal).

And voila we have horizontally fading text.

Quick Tip: How To Clear Out the Swatches Panel in Photoshop CS5

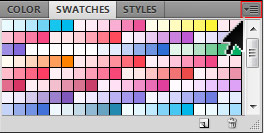
After much searching, I think I have come across the best method for clearing out the swatches panel in Photoshop CS5.  Open the swatches panel menu (shown in the image below) and choose Preset Manager.  In the Preset Manager you can click on the first colour and then while holding SHIFT click the last colour.  All the colours in the panel are now selected.  Click the Delete button on the right side of the panel.  Swatches panel cleared!

Swatches Panel

The location of the panel menu in the Swatches Panel